If you are the Company Admin for your account, you have the ability to add and edit users.
Step 1: Client Portal
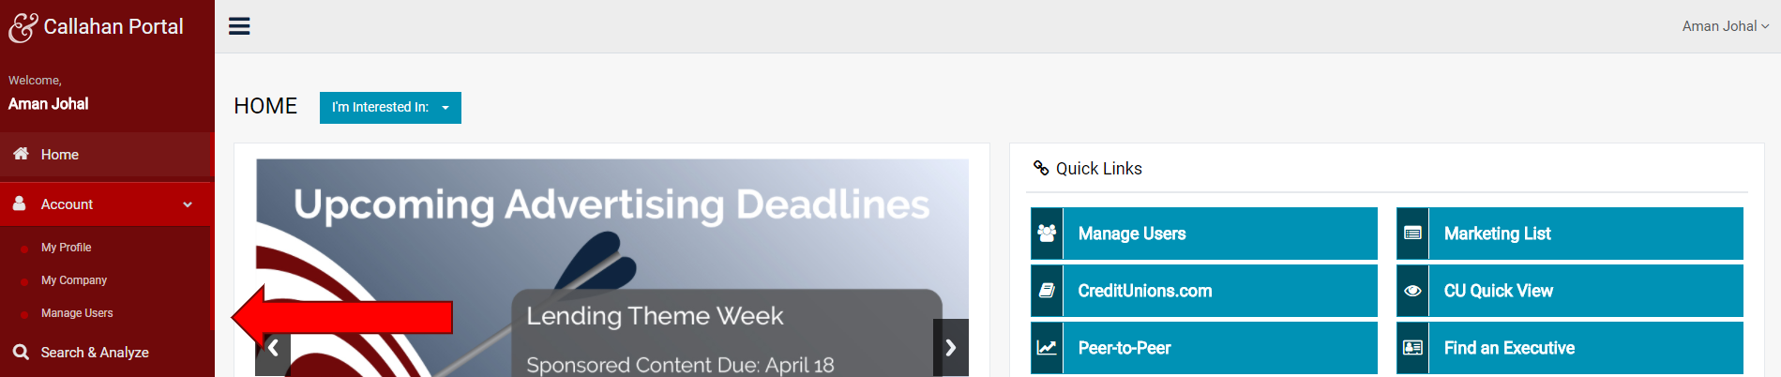
To add, remove, or edit a user’s information first you need to go to your Callahan Client Portal (click here) navigate to the ‘Manage Users’ page. This can be found by either clicking on your name in the top right corner or clicking on ‘Account’ in the left hand navigation. If you are an admin, the option ‘Manage Users’ should appear in the drop down menu.
Note: If you do not see the Manage Users option, this is because you are not a company admin user. To get changes made, you will need to contact your company admin. If you don’t know your company admin or your account manager from Callahan, please email the Callahan Support Team here and they will get back to you very quickly.

Step 2: Manage Users Page
On the Manage Users page, you can do several things – the steps for each task are below:
Add New User
In the first Manage Users page, there is a button on the right side of the screen to ‘Add A New User’.
To add a user, simply fill out this information and hit ‘Save New User’ – they will be added to the company’s list of users and give them rights to access any products to which the company partnership with Callahan permits access. You will have to create a password for the new user, but they will be able to update this once they log into the Callahan Portal or CreditUnions.com.
The new user will be sent an email asking them to activate their account. The link will take them back to CreditUnions.com, where they simply need to log in. From then forward, they can access any of the resources affiliated with the company’s Callahan partnership.
Edit User Information
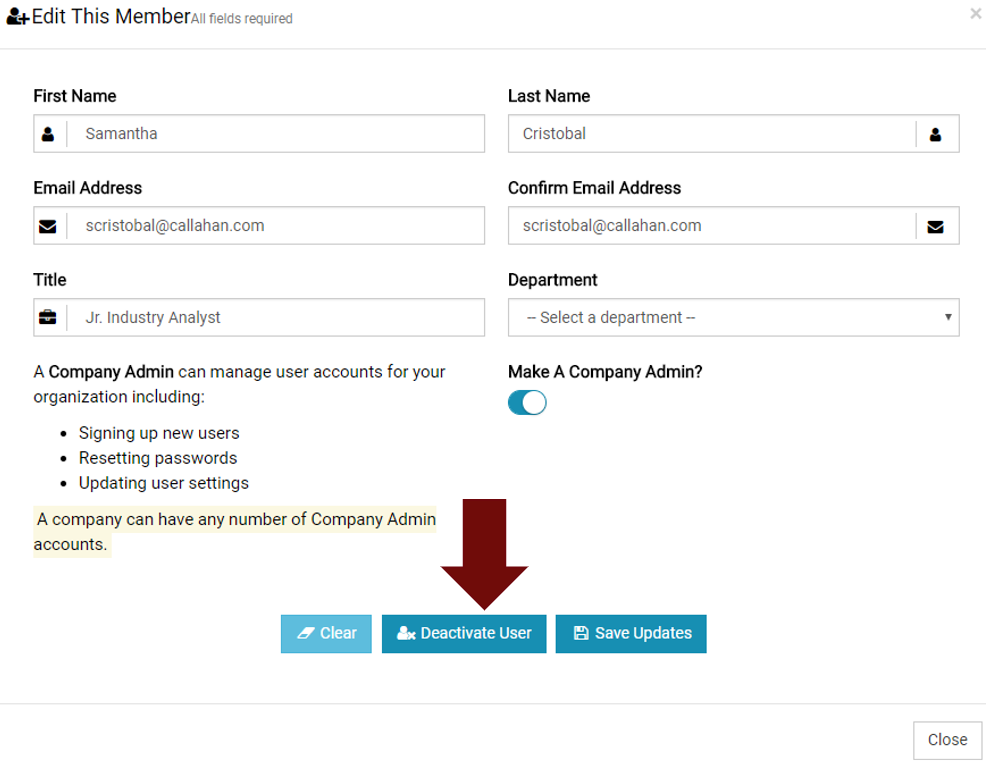
To edit a current user’s information, find the user in the Active Users table at the bottom of the page. To modify their entry, click Edit. The user’s information will populate in a pop-up – you can change any of the fields and click Save Updates when you are finished.
Remove User
To remove a user, click Edit next to that user’s name in the Active Members table. Our system does not delete the user from your view, however you are able to see who is deactivated in the last column of the Active Members table. To remove a user’s access, click the ‘Deactivate User’ button at the bottom of the pop-up. This will remove a user’s access. They will be able to log into CreditUnions.com but will only be able to view the free-level content.
Update Company Domain
The top of the Manage Users screen shows a box where your company email domain(s) is listed. The way this works is that if you include a domain there – for example, at callahan, we use @callahan.com – all users with that domain can be added to an account – or can add themselves, without requiring additional administrator approval. If your company email domain changes, or if you go through a merger that involves renaming, updating this domain is important to making sure your colleagues can register easily.
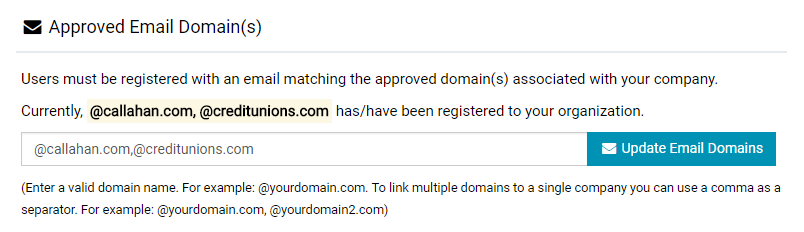
To add a domain, simply enter in the format @callahan.com and hit ‘Update Email Domain’. If you want to list multiple domains, simply separate them with a comma.
How does this domain business work? If someone from your institution registers for the portal with joesmith@creditunion.org, and @creditunion.org is your domain, they will be granted access. If they sign up with, say, a gmail or yahoo address, they will be registered in the system but won’t have access to your company’s resources (analytical tools, etc) until the company’s admin approves their request. They get this request via an email.