PART I – CUSTOMIZING YOUR MARKETING LIST OPTIONS
Q: Why do I need to customize my marketing list field options?
A: There are hundreds of potential fields that you may include in marketing lists. So you do not have to sort through the hundreds of options (some of which may never be applicable to your targeting efforts) each time you build a new marketing list, we have designed the program so you can perform a one-time customization. Follow the below steps to establish the marketing list fields you may want to include in a list!
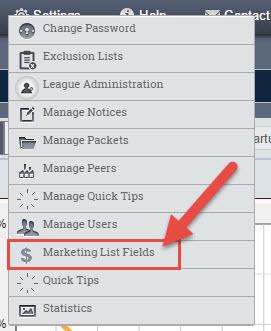
Step 1: Hover over Settings near the top of your screen.

Step 2: In the drop down menu, click on Marketing List Fields.
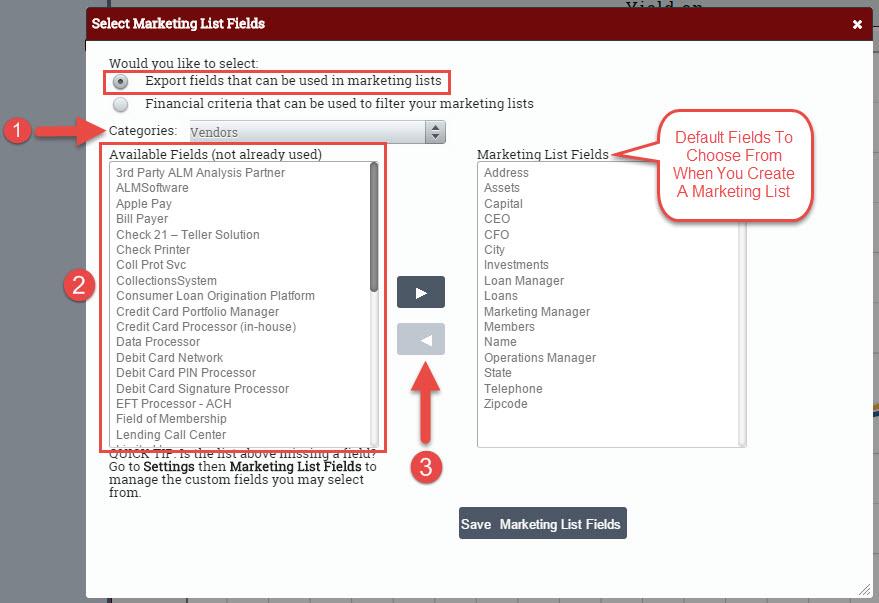
Step 3: You should now be looking at the Select Marketing List Fields pop-up.
- Selecting the first circle, Export fields that can be used in marketing lists, means you are choosing the actual columns (i.e., fields) that will potentially make-up the list. In other words, all the information you want to pull for each credit union that you are trying to target.
- Selecting the second circle, Financial criteria that can be used to filter your marketing lists, means you are choosing the potential financial criteria that you may use to shape the group of credit unions you intend to target.

Step 4: Proceeding under the assumption that you have selected the first circle, now you may start choosing the marketing list fields. The right hand list (Fields In Your Marketing List) contains the default fields that you may later choose from when you actually build a marketing list.
- Use the Categories drop down to sort through the list options.
- When you click on any category in the drop down, the available fields will populate in the left hand list, Available Fields (not already used).
- To select the fields you may include in future marketing lists, double click on the field name or use the blue arrows. As you make your selections, they will appear in the right hand list.
Step 5: Once you are satisfied with the Step 4 selections, select the second circle, Financial criteria that can be used to filter your marketing lists. Please note that the right hand list now contains the default financial criteria.
- Use the Categories drop down to sort through the list options.
- When you click on any category in the drop down, the available financial criteria will populate in the left hand list, Available Fields (not already used).
- To select the financial criteria you may use to target specific credit unions, double click on the field name or use the blue arrows. As you make your selections, they will appear in the right hand list.

Step 6: Once satisfied with your selections, click Save Criteria Formulas.

PART II – BUILD A MARKETING LIST
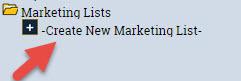
Step 1: Locate Marketing Lists at the bottom of the left hand navigation. Click on the folder to expand it.

Step 2: Click on –Create New Marketing List-.
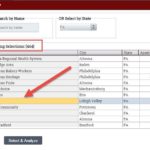
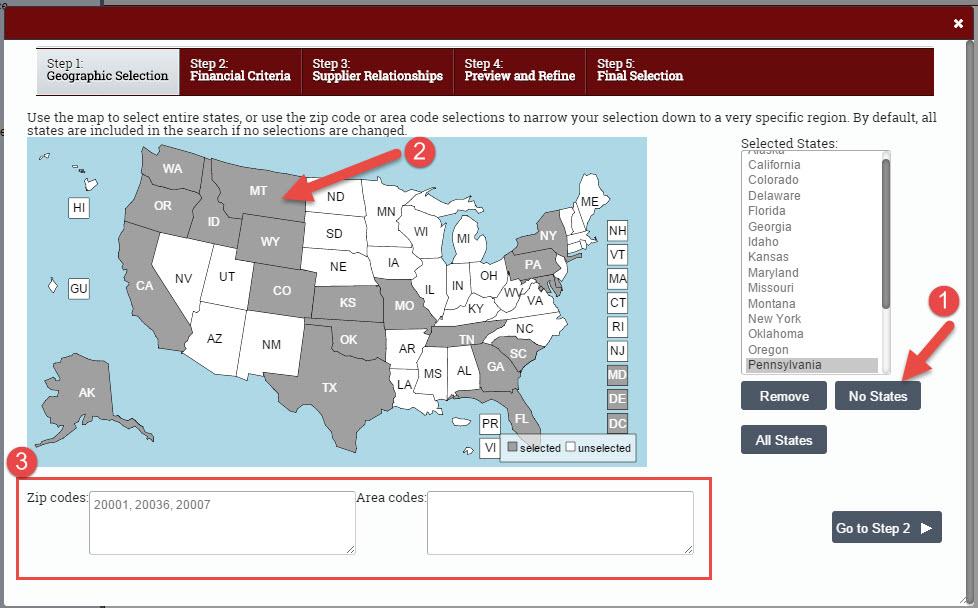
Step 3: Set the Geographical criteria for your marketing list.
- By default, all states are selected. To deselect all states, click the No States button.
- To select a state(s), click on the state in the map so it turns grey.
- If you want to target a very specific set of credit unions, type a specific zip code(s) or area code(s) into the Zip Codes or Area Codes fields.
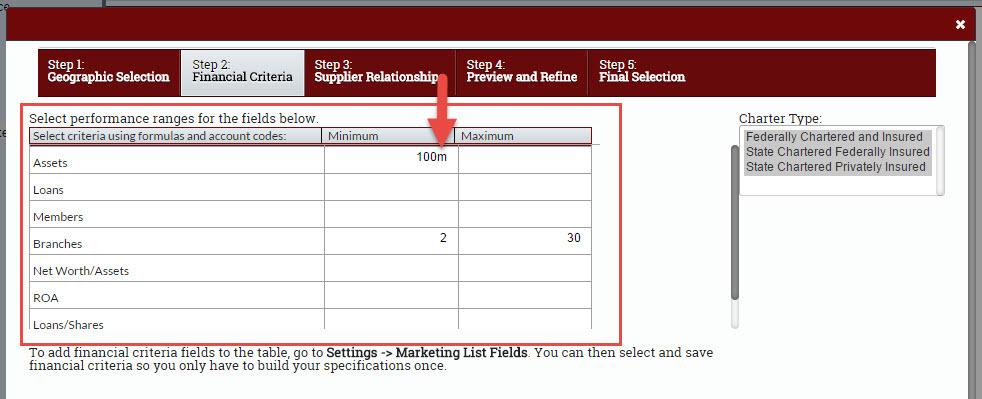
Step 4: Near the top of the pop up, click on the Step 2: Financial Criteria tab.
NOTE: Recall Part I – Step 5 above? This is where the financial criteria you selected appear!

Step 5: Choose the Financial Criteria for your marketing list. You may enter minimum and/or maximum ranges for each criterion. When setting minimum and maximum criteria, use the following notation:
- K = thousand … example: 100k = $100,000
- M = million … example: 100m = $100,000,000
- B = billion … example: 100b = $100,000,000,000
NOTE: You do not have to set BOTH a minimum and a maximum, but you can if it suits your targeting needs.
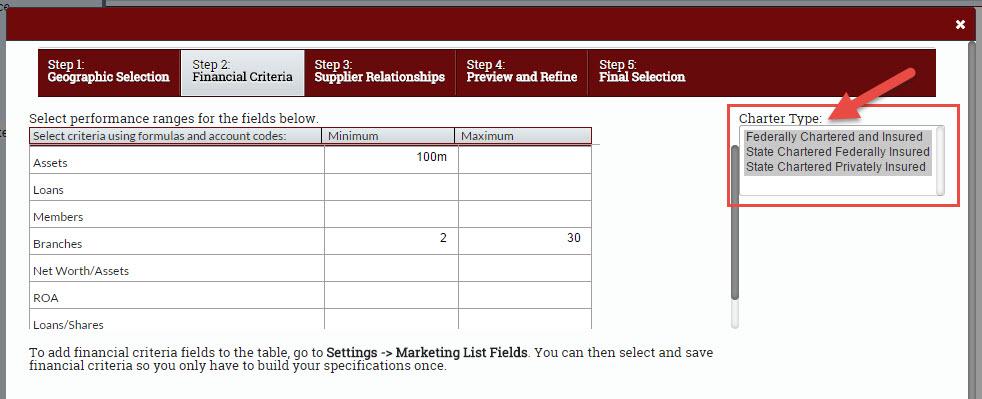
Step 6: Select a specific Charter Type(s) in the Charter Type list. By default, all charter types are selected (as indicated by the grey highlighting).
NOTE: To select more than charter type, please be sure to hold down the Ctrl key when you click in the list; if you are using a MAC, hold down the Command key.
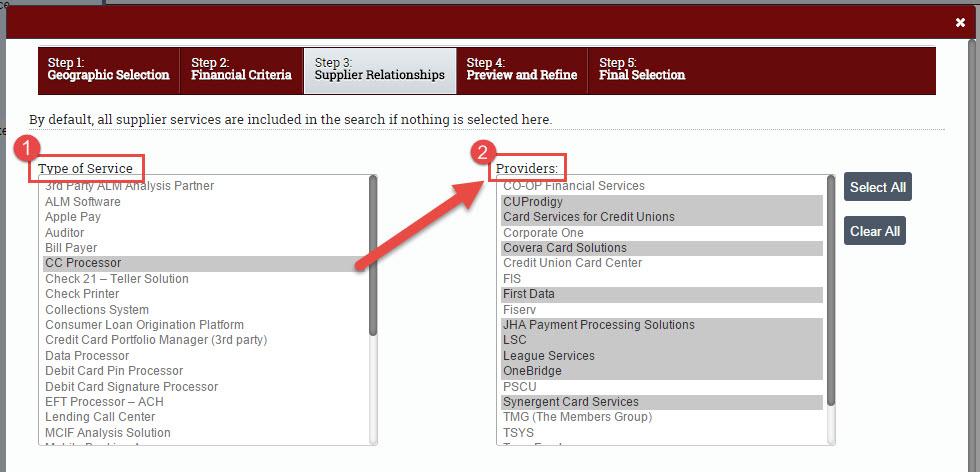
Step 7: Near the top of the pop up, click on the Step 3: Supplier Relationships tab.

Step 8: Shape the credit unions you target based on the specific vendors.
- In the Type of Service list, select from various service types. Click on any service type and the specific vendors will appear in the right hand list labeled Providers.
- Choose specific vendors in the Providers list. By default, all vendors are selected.
NOTE: If you wish to select more than one type of service/provider, you must hold down the Ctrl key on your keyboard when you click. If you are a MAC user, hold down the Command key.
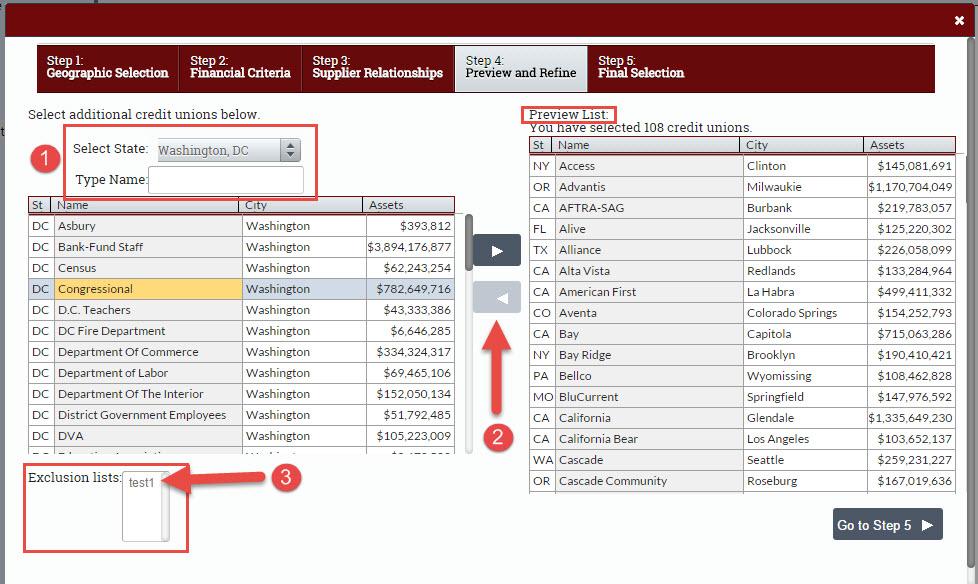
Step 9: Near the top of the pop up, click on the Step 4: Preview and Refine tab.

Step 10: The right hand list, Preview List, shows all the credit unions that fit the criteria you have established thus far.
- To add specific credit unions to the list, use the Select State drop down or Type Name fields.
- Use the blue arrows to add credit unions to your marketing list (or remove them from the list).
- To activate any Exclusion lists, click on the list(s) located in the lower left hand corner; the Preview List will regenerate.
NOTE: Learn how to build an exclusion list by viewing the How-To Create An Exclusion List guide.
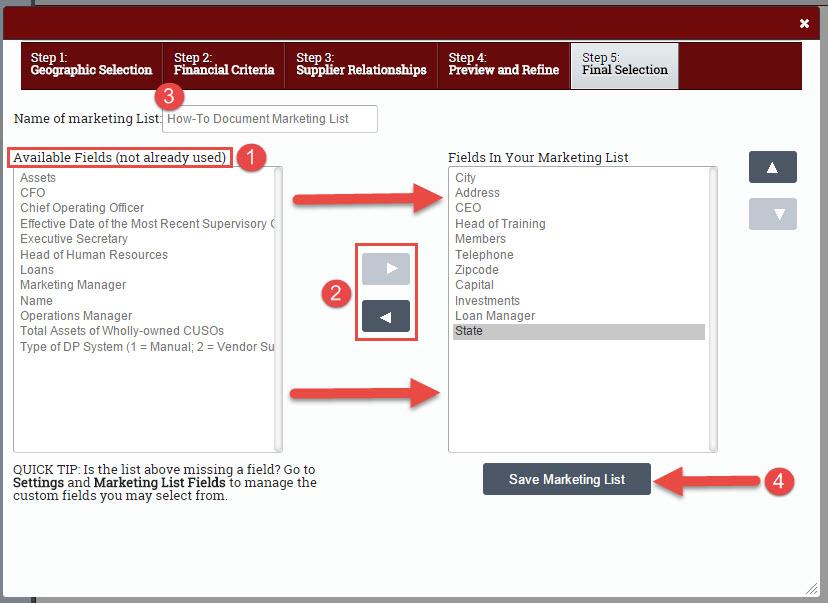
Step 11: Near the top of the pop up, click on Step 5: Final Selection.

- The left hand list Available Fields (not already used) contain all of fields you selected wayyyy back in Part I – Step 4.
- Use the blue arrows to move the fields into Fields In Your Marketing List.
- Give the marketing list an appropriate name in the Name of Marketing List text field.
- Click the Save Marketing List button.
CONGRATULATIONS, YOU HAVE BUILT A MARKETING LIST.
[zilla_button url=”/support/wp-content/uploads/2016/06/How-To-Build-A-Marketing-List.pdf” style=”blue” size=”medium” type=”square” target=”_blank”] Download/View PDF [/zilla_button]